一、前言
Sentinel 是阿里巴巴开源的一款面向分布式服务架构的流量控制组件,主要用来保障微服务的稳定性与弹性。它于2018年正式开源,现已成为Apache Dubbo、Spring Cloud Alibaba等生态的重要组成部分。
Sentinel的核心功能:
流量控制:通过QPS或线程数等维度限制入口流量,防止系统被突发流量冲垮
熔断降级:当依赖的服务出现异常(如响应时间过长、错误率过高)时,自动切断请求,防止级联故障
系统自适应保护:根据系统负载(如CPU使用率、平均响应时间)动态调整流量
热点参数限流:对特定参数值的访问频次进行控制
实时监控:提供可视化的运行时监控面板,支持规则动态配置
二、在docker中拉取sentinel镜像
# 拉取最新版Sentinel镜像
docker pull bladex/sentinel-dashboard:latest
进行启动镜像:
docker run -d \
  --name sentinel-dashboard \
  -p 8858:8858 \
  -e JAVA_OPTS="-Dserver.port=8858" \
  --restart=always \
  bladex/sentinel-dashboard:latest
三、进入控制台路径访问
进行访问sentinel控制台:
http://服务器IP:8858

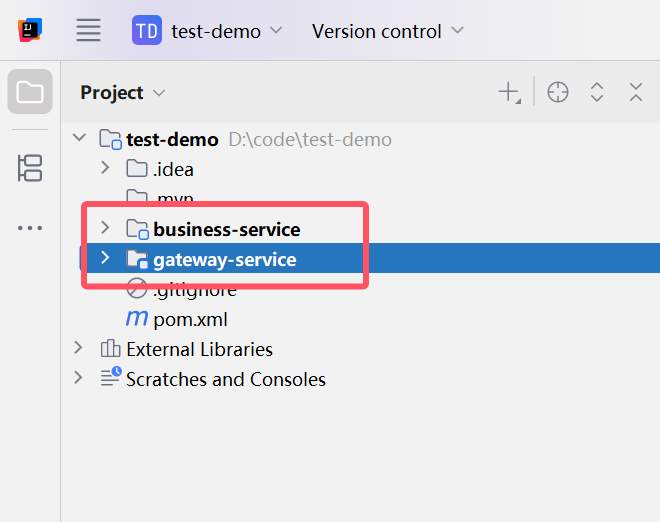
四、创建基础测试示例(需搭建两个服务:网关服务与业务服务)
父类pom文件
<?xml version="1.0" encoding="UTF-8"?>
<project xmlns="http://maven.apache.org/POM/4.0.0"
         xmlns:xsi="http://www.w3.org/2001/XMLSchema-instance"
         xsi:schemaLocation="http://maven.apache.org/POM/4.0.0 http://maven.apache.org/xsd/maven-4.0.0.xsd">
    <modelVersion>4.0.0</modelVersion>

    <groupId>com.ruoyi.vehicle</groupId>
    <artifactId>test-demo</artifactId>
    <version>1.0-SNAPSHOT</version>
    <packaging>pom</packaging>  <!-- 关键修改:设置为pom类型 -->

    <properties>
        <java.version>17</java.version>
        <maven.compiler.source>17</maven.compiler.source>
        <maven.compiler.target>17</maven.compiler.target>
        <project.build.sourceEncoding>UTF-8</project.build.sourceEncoding>

        <!-- Spring Boot版本 -->
        <spring-boot.version>2.7.15</spring-boot.version>

        <!-- Spring Cloud版本 -->
        <spring-cloud.version>2021.0.8</spring-cloud.version>

        <!-- Spring Cloud Alibaba版本 -->
        <spring-cloud-alibaba.version>2021.0.5.0</spring-cloud-alibaba.version>
    </properties>

    <!-- 关键修改:添加Spring Boot父依赖 -->
    <parent>
        <groupId>org.springframework.boot</groupId>
        <artifactId>spring-boot-starter-parent</artifactId>
        <version>2.7.15</version>
        <relativePath/> <!-- 指定从Maven仓库查找父POM -->
    </parent>

    <!-- 关键修改:添加模块定义 -->
    <modules>
        <module>gateway-service</module>
        <module>business-service</module>
    </modules>

    <!-- 关键修改:依赖管理 -->
    <dependencyManagement>
        <dependencies>
            <!-- Spring Cloud 依赖管理 -->
            <dependency>
                <groupId>org.springframework.cloud</groupId>
                <artifactId>spring-cloud-dependencies</artifactId>
                <version>${spring-cloud.version}</version>
                <type>pom</type>
                <scope>import</scope>
            </dependency>

            <!-- Spring Cloud Alibaba 依赖管理 -->
            <dependency>
                <groupId>com.alibaba.cloud</groupId>
                <artifactId>spring-cloud-alibaba-dependencies</artifactId>
                <version>${spring-cloud-alibaba.version}</version>
                <type>pom</type>
                <scope>import</scope>
            </dependency>
        </dependencies>
    </dependencyManagement>

</project>
业务服务
以下是依赖和代码(仅供参考):
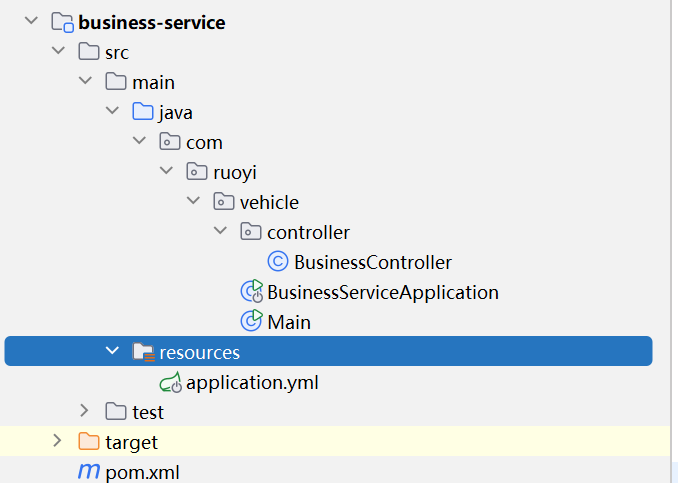
在业务服务里面添加一个Controller,代码如下:
package com.ruoyi.vehicle.controller;

import org.springframework.stereotype.Controller;
import org.springframework.web.bind.annotation.GetMapping;
import org.springframework.web.bind.annotation.RequestMapping;
import org.springframework.web.bind.annotation.RestController;

@Controller
@RestController
@RequestMapping("/api")
public class BusinessController {
    @GetMapping(value = "/test-business")
    public String test(){
        return "Hello from Business Service!";
    }
}
启动类,代码如下:
package com.ruoyi.vehicle;

import org.springframework.boot.SpringApplication;
import org.springframework.boot.autoconfigure.SpringBootApplication;
import org.springframework.cloud.client.discovery.EnableDiscoveryClient;
import org.springframework.web.bind.annotation.GetMapping;
import org.springframework.web.bind.annotation.RestController;

@SpringBootApplication
@EnableDiscoveryClient
public class BusinessServiceApplication {
    public static void main(String[] args) {
        SpringApplication.run(BusinessServiceApplication.class, args);
    }
}
resources下的application.yml,配置如下:
server:
  port: 8081

spring:
  application:
    name: business-service

  cloud:
    nacos:
      discovery:
        server-addr: 192.168.80.131:8848
      config:
        server-addr: 192.168.80.131:8848
        file-extension: yaml
        group: DEFAULT_GROUP
    sentinel:
      enabled: true
      transport:
        dashboard: 192.168.80.131:8858
        port: 8720
      eager: true
# business-service 配置
management:
  endpoints:
    web:
      exposure:
        include: health
  endpoint:
    health:
      show-details: always
pom文件,依赖如下:
<?xml version="1.0" encoding="UTF-8"?>
<project xmlns="http://maven.apache.org/POM/4.0.0"
         xmlns:xsi="http://www.w3.org/2001/XMLSchema-instance"
         xsi:schemaLocation="http://maven.apache.org/POM/4.0.0 http://maven.apache.org/xsd/maven-4.0.0.xsd">
    <modelVersion>4.0.0</modelVersion>

    <parent>
        <groupId>com.ruoyi.vehicle</groupId>
        <artifactId>test-demo</artifactId>
        <version>1.0-SNAPSHOT</version>
    </parent>

    <artifactId>business-service</artifactId>
    <packaging>jar</packaging> <!-- 业务服务打包为jar -->

    <properties>
        <maven.compiler.source>17</maven.compiler.source>
        <maven.compiler.target>17</maven.compiler.target>
        <project.build.sourceEncoding>UTF-8</project.build.sourceEncoding>
    </properties>

    <dependencies>
        <!-- Spring Boot Web -->
        <dependency>
            <groupId>org.springframework.boot</groupId>
            <artifactId>spring-boot-starter-web</artifactId>
        </dependency>

        <!-- Nacos Discovery (服务发现) -->
        <dependency>
            <groupId>com.alibaba.cloud</groupId>
            <artifactId>spring-cloud-starter-alibaba-nacos-discovery</artifactId>
        </dependency>

        <!-- Sentinel -->
        <dependency>
            <groupId>com.alibaba.cloud</groupId>
            <artifactId>spring-cloud-starter-alibaba-sentinel</artifactId>
        </dependency>

        <!-- Actuator (监控) -->
        <dependency>
            <groupId>org.springframework.boot</groupId>
            <artifactId>spring-boot-starter-actuator</artifactId>
        </dependency>

        <!-- Lombok (可选,用于简化代码) -->
        <dependency>
            <groupId>org.projectlombok</groupId>
            <artifactId>lombok</artifactId>
            <optional>true</optional>
        </dependency>

        <!-- Spring Boot Test (测试) -->
        <dependency>
            <groupId>org.springframework.boot</groupId>
            <artifactId>spring-boot-starter-test</artifactId>
            <scope>test</scope>
        </dependency>
    </dependencies>

    <build>
        <plugins>
            <!-- Maven编译插件 -->
            <plugin>
                <groupId>org.apache.maven.plugins</groupId>
                <artifactId>maven-compiler-plugin</artifactId>
                <version>3.8.1</version>
                <configuration>
                    <source>17</source>
                    <target>17</target>
                    <encoding>UTF-8</encoding>
                </configuration>
            </plugin>

            <!-- Spring Boot Maven插件 -->
            <plugin>
                <groupId>org.springframework.boot</groupId>
                <artifactId>spring-boot-maven-plugin</artifactId>
                <version>${spring-boot.version}</version>
                <configuration>
                    <excludes>
                        <exclude>
                            <groupId>org.projectlombok</groupId>
                            <artifactId>lombok</artifactId>
                        </exclude>
                    </excludes>
                </configuration>
            </plugin>
        </plugins>
    </build>
</project>
网关服务
以下是依赖和代码(仅供参考):
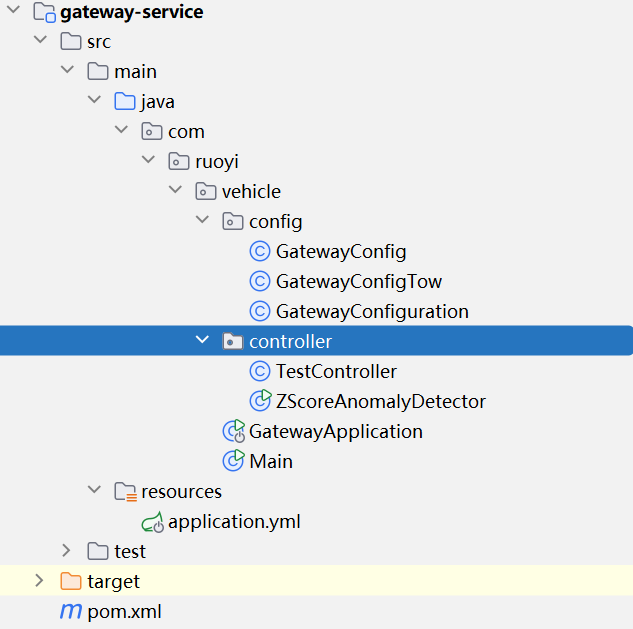
创建包含限流、过滤器和限流报错信息的配置代码示例如下:
GatewayConfig:
package com.ruoyi.vehicle.config;

import com.alibaba.csp.sentinel.adapter.gateway.sc.SentinelGatewayFilter;
import com.alibaba.csp.sentinel.adapter.gateway.sc.callback.BlockRequestHandler;
import com.alibaba.csp.sentinel.adapter.gateway.sc.callback.GatewayCallbackManager;
import com.alibaba.csp.sentinel.adapter.gateway.sc.exception.SentinelGatewayBlockExceptionHandler;
import org.springframework.cloud.gateway.route.RouteLocator;
import org.springframework.cloud.gateway.route.builder.RouteLocatorBuilder;
import org.springframework.context.annotation.Bean;
import org.springframework.context.annotation.Configuration;
import org.springframework.http.HttpStatus;
import org.springframework.http.MediaType;
import org.springframework.web.reactive.function.BodyInserters;
import org.springframework.web.reactive.function.server.ServerResponse;
import org.springframework.web.server.ServerWebExchange;

import javax.annotation.PostConstruct;
import java.util.HashMap;
import java.util.Map;

@Configuration
public class GatewayConfig {

    private final SentinelGatewayBlockExceptionHandler exceptionHandler;
    private final SentinelGatewayFilter sentinelGatewayFilter;

    public GatewayConfig(SentinelGatewayBlockExceptionHandler exceptionHandler,
                         SentinelGatewayFilter sentinelGatewayFilter) {
        this.exceptionHandler = exceptionHandler;
        this.sentinelGatewayFilter = sentinelGatewayFilter;
    }

    @PostConstruct
    public void init() {
        // 设置自定义的限流响应
        BlockRequestHandler blockRequestHandler = (exchange, t) -> {
            Map<String, Object> result = new HashMap<>();
            result.put("code", 429);
            result.put("message", "请求过于频繁,请稍后再试");
            result.put("route", exchange.getRequest().getPath().value());
            result.put("timestamp", System.currentTimeMillis());

            return ServerResponse.status(HttpStatus.TOO_MANY_REQUESTS)
                    .contentType(MediaType.APPLICATION_JSON)
                    .body(BodyInserters.fromValue(result));
        };

        GatewayCallbackManager.setBlockHandler(blockRequestHandler);

        System.out.println("✅ Gateway flow control initialized successfully!");
    }

    @Bean
    public RouteLocator customRouteLocator(RouteLocatorBuilder builder) {
        return builder.routes()
                .route("test-route", r -> r.path("/api/**")
                        .filters(f -> f.stripPrefix(1))
                        .uri("https://httpbin.org"))
                .build();
    }
}
GatewayConfigTow:
package com.ruoyi.vehicle.config;

import com.alibaba.csp.sentinel.adapter.gateway.sc.SentinelGatewayFilter;
import org.springframework.cloud.gateway.filter.GlobalFilter;
import org.springframework.context.annotation.Bean;
import org.springframework.context.annotation.Configuration;
import org.springframework.core.annotation.Order;

@Configuration
public class GatewayConfigTow {
    @Bean
    @Order(-1) // 确保在其他过滤器前执行
    public GlobalFilter sentinelGatewayFilter() {
        return new SentinelGatewayFilter();
    }
}
GatewayConfiguration:
package com.ruoyi.vehicle.config;

import com.alibaba.csp.sentinel.adapter.gateway.common.rule.GatewayFlowRule;
import com.alibaba.csp.sentinel.adapter.gateway.common.rule.GatewayRuleManager;
import com.alibaba.csp.sentinel.adapter.gateway.sc.callback.BlockRequestHandler;
import com.alibaba.csp.sentinel.adapter.gateway.sc.callback.GatewayCallbackManager;
import org.springframework.context.annotation.Configuration;
import org.springframework.http.HttpStatus;
import org.springframework.web.reactive.function.server.ServerResponse;

import javax.annotation.PostConstruct;
import java.util.HashMap;
import java.util.HashSet;
import java.util.Map;
import java.util.Set;

@Configuration
public class GatewayConfiguration {

    @PostConstruct
    public void initGatewayRules() {
        Set<GatewayFlowRule> rules = new HashSet<>();

        // 创建网关流控规则 - 针对路由ID进行限流
        GatewayFlowRule rule = new GatewayFlowRule("business-service-route")
                .setCount(1)  // 每秒1个请求
                .setIntervalSec(1)
                .setBurst(2);

        rules.add(rule);
        GatewayRuleManager.loadRules(rules);

        // 设置阻塞处理器
        BlockRequestHandler blockHandler = (exchange, t) -> {
            Map<String, Object> result = new HashMap<>();
            result.put("code", 429);
            result.put("message", "请求过于频繁");
            return ServerResponse.status(HttpStatus.TOO_MANY_REQUESTS)
                    .bodyValue(result);
        };

        GatewayCallbackManager.setBlockHandler(blockHandler);
    }
}
创建一个Controller(用来测试),代码如下:
package com.ruoyi.vehicle.controller;

import org.springframework.stereotype.Controller;
import org.springframework.web.bind.annotation.GetMapping;
import org.springframework.web.bind.annotation.RequestMapping;
import org.springframework.web.bind.annotation.RestController;

import java.util.HashMap;
import java.util.Map;

@RestController
@Controller
@RequestMapping("/api")
public class TestController {

    @GetMapping("/health")
    public Map<String, Object> healthCheck() {
        Map<String, Object> result = new HashMap<>();
        result.put("status", "UP");
        result.put("service", "API Gateway");
        result.put("timestamp", System.currentTimeMillis());
        return result;
    }

    @GetMapping("/test")
    public Map<String, Object> test() {
        Map<String, Object> result = new HashMap<>();
        result.put("message", "Hello from API Gateway!");
        result.put("timestamp", System.currentTimeMillis());
        return result;
    }
}
application.yml配置文件,配置如下:
server:
port: 8080
spring:
main:
allow-bean-definition-overriding: true # 允许Bean定义覆盖
application:
name: api-gateway
redis:
host: 192.168.80.131
port: 6379
password: 123456
cloud:
gateway:
routes:
- id: business-service-route
uri: lb://business-service
predicates:
- Path=/api/**
filters:
- StripPrefix=1
metadata:
# 实例权重配置 (需配合Nacos元数据)
lb-weight: true
# ✅ 启用响应时间加权策略
lb-strategy: RESPONSE_TIME
# ✅ 负载均衡配置
httpclient:
connect-timeout: 1000
response-timeout: 5s
loadbalancer:
enabled: true
retry:
enabled: true
max-retries-on-same-service-instance: 1
max-retries-on-next-service-instance: 2
discovery:
locator:
enabled: false
# ✅ 修正负载均衡健康检查配置(需要Map格式)
loadbalancer:
configurations: response-time
clients:
business-service:
configurations: default
health-check:
enabled: true
# ✅ 恢复为Map格式配置
path:
default: /actuator/health
interval: 10s
nacos:
discovery:
server-addr: 192.168.80.131:8848
sentinel:
enabled: true
transport:
dashboard: 192.168.80.131:8858
port: 8719
eager: true
web-context-unify: false
scg:
enabled: true
fallback:
mode: response
response-status: 429
# ✅ 修正:使用Spring表达式语法
response-body: '{"code":429,"message":"请求过于频繁,请稍后再试","timestamp":#{T(java.lang.System).currentTimeMillis()}}'
content-type: application/json
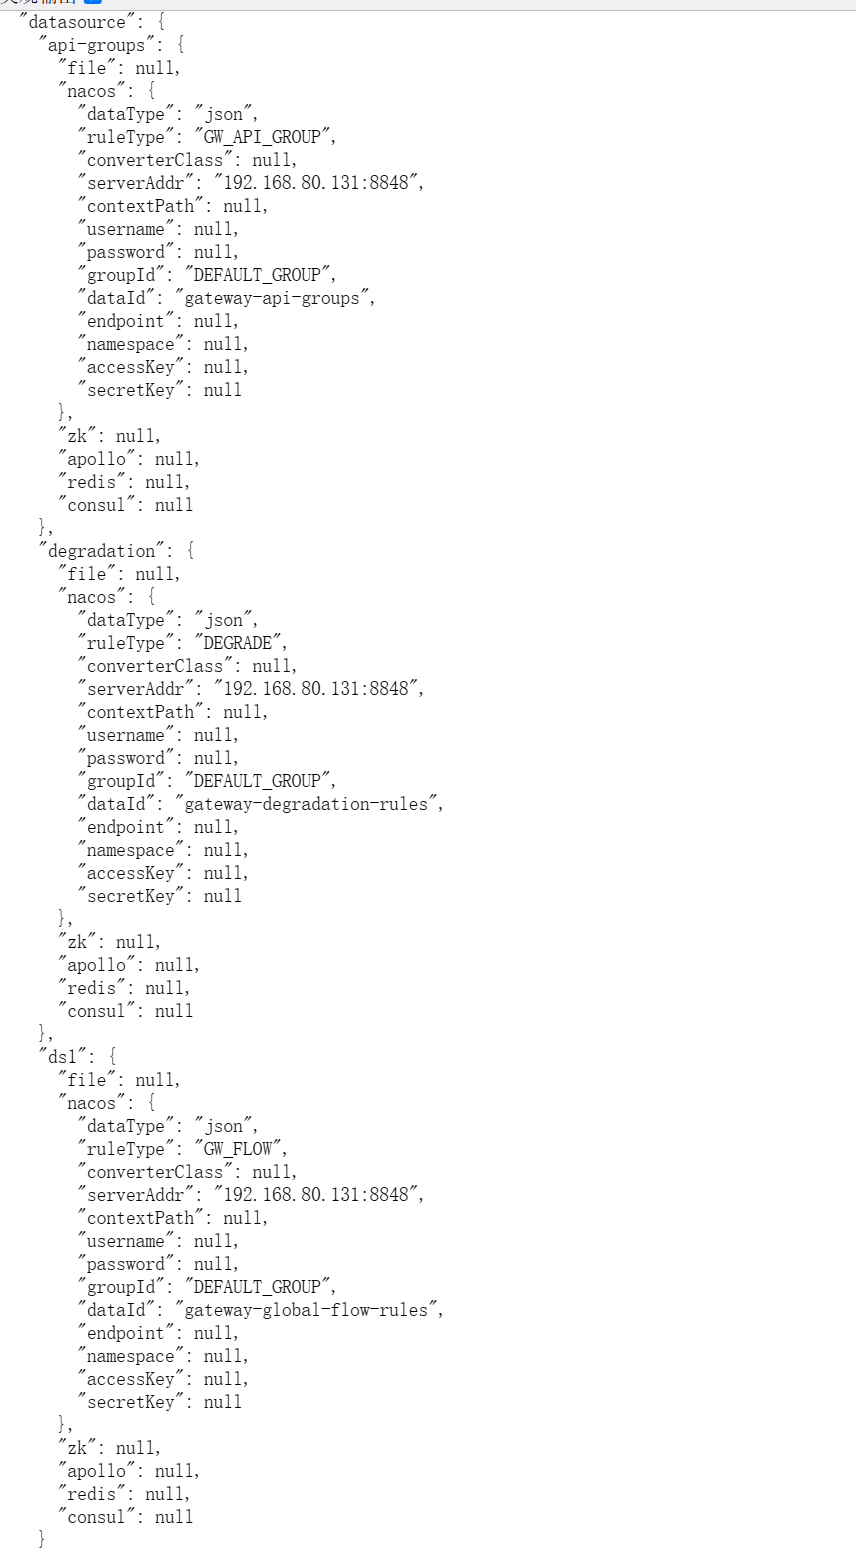
# ✅ 所有数据源必须在 datasource 下!
datasource:
ds1:
nacos:
server-addr: 192.168.80.131:8848
data-id: gateway-global-flow-rules
group-id: DEFAULT_GROUP
rule-type: gw-flow
data-type: json
auto-refresh: true
# ✅ 正确位置:与 ds1 同级
api-groups:
nacos:
server-addr: 192.168.80.131:8848
data-id: gateway-api-groups
group-id: DEFAULT_GROUP
rule-type: gw-api-group # ✅ 关键!
data-type: json
auto-refresh: true
# ✅ 熔断规则数据源
degradation:
nacos:
server-addr: 192.168.80.131:8848
group-id: DEFAULT_GROUP
data-id: gateway-degradation-rules
rule-type: degrade
data-type: json
auto-refresh: true
management:
endpoints:
web:
exposure:
include: '*'
endpoint:
health:
show-details: always
gateway:
enabled: true
sentinel:
enabled: true
pom文件,依赖如下:
<?xml version="1.0" encoding="UTF-8"?>
<project xmlns="http://maven.apache.org/POM/4.0.0"
         xmlns:xsi="http://www.w3.org/2001/XMLSchema-instance"
         xsi:schemaLocation="http://maven.apache.org/POM/4.0.0
         http://maven.apache.org/xsd/maven-4.0.0.xsd">
    <modelVersion>4.0.0</modelVersion>

    <parent>
        <groupId>org.springframework.boot</groupId>
        <artifactId>spring-boot-starter-parent</artifactId>
        <version>2.7.18</version>
        <relativePath/>
    </parent>

    <groupId>com.example</groupId>
    <artifactId>api-gateway</artifactId>
    <version>0.0.1-SNAPSHOT</version>
    <name>api-gateway</name>
    <description>API Gateway with Sentinel Flow Control</description>

    <properties>
        <java.version>1.8</java.version>
        <spring-cloud.version>2021.0.8</spring-cloud.version>
        <spring-cloud-alibaba.version>2021.0.5.0</spring-cloud-alibaba.version>
        <project.build.sourceEncoding>UTF-8</project.build.sourceEncoding>
    </properties>

    <dependencyManagement>
        <dependencies>
            <dependency>
                <groupId>org.springframework.cloud</groupId>
                <artifactId>spring-cloud-dependencies</artifactId>
                <version>${spring-cloud.version}</version>
                <type>pom</type>
                <scope>import</scope>
            </dependency>
            <dependency>
                <groupId>org.springframework.boot</groupId>
                <artifactId>spring-boot-starter-data-redis-reactive</artifactId>
                <version>2.7.18</version>
            </dependency>
            <dependency>
                <groupId>com.alibaba.cloud</groupId>
                <artifactId>spring-cloud-alibaba-dependencies</artifactId>
                <version>${spring-cloud-alibaba.version}</version>
                <type>pom</type>
                <scope>import</scope>
            </dependency>
        </dependencies>
    </dependencyManagement>

    <dependencies>
        <!-- Spring Cloud Gateway -->
        <dependency>
            <groupId>org.springframework.cloud</groupId>
            <artifactId>spring-cloud-starter-gateway</artifactId>
        </dependency>
        <!-- ✅ 负载均衡核心依赖 -->
        <dependency>
            <groupId>org.springframework.cloud</groupId>
            <artifactId>spring-cloud-starter-loadbalancer</artifactId>
        </dependency>
        <dependency>
            <groupId>com.alibaba.csp</groupId>
            <artifactId>sentinel-spring-cloud-gateway-adapter</artifactId>
        </dependency>
        <!-- Nacos Discovery -->
        <dependency>
            <groupId>com.alibaba.cloud</groupId>
            <artifactId>spring-cloud-starter-alibaba-nacos-discovery</artifactId>
        </dependency>

        <!-- Sentinel Core -->
        <dependency>
            <groupId>com.alibaba.cloud</groupId>
            <artifactId>spring-cloud-starter-alibaba-sentinel</artifactId>
        </dependency>

        <!-- Sentinel Nacos 数据源 -->
        <dependency>
            <groupId>com.alibaba.csp</groupId>
            <artifactId>sentinel-datasource-nacos</artifactId>
        </dependency>

        <!-- Gateway与Sentinel集成 -->
        <dependency>
            <groupId>com.alibaba.cloud</groupId>
            <artifactId>spring-cloud-alibaba-sentinel-gateway</artifactId>
        </dependency>

        <!-- Actuator for monitoring -->
        <dependency>
            <groupId>org.springframework.boot</groupId>
            <artifactId>spring-boot-starter-actuator</artifactId>
        </dependency>

        <!-- WebFlux for reactive programming -->
        <dependency>
            <groupId>org.springframework.boot</groupId>
            <artifactId>spring-boot-starter-webflux</artifactId>
        </dependency>

        <!-- Redis for RequestRateLimiter -->
        <dependency>
            <groupId>org.springframework.boot</groupId>
            <artifactId>spring-boot-starter-data-redis-reactive</artifactId>
        </dependency>

        <!-- Lombok for convenience -->
        <dependency>
            <groupId>org.projectlombok</groupId>
            <artifactId>lombok</artifactId>
            <optional>true</optional>
        </dependency>

        <!-- Test dependencies -->
        <dependency>
            <groupId>org.springframework.boot</groupId>
            <artifactId>spring-boot-starter-test</artifactId>
            <scope>test</scope>
        </dependency>
        <dependency>
            <groupId>io.projectreactor</groupId>
            <artifactId>reactor-test</artifactId>
            <scope>test</scope>
        </dependency>
    </dependencies>

    <build>
        <plugins>
            <plugin>
                <groupId>org.springframework.boot</groupId>
                <artifactId>spring-boot-maven-plugin</artifactId>
                <configuration>
                    <excludes>
                        <exclude>
                            <groupId>org.projectlombok</groupId>
                            <artifactId>lombok</artifactId>
                        </exclude>
                    </excludes>
                </configuration>
            </plugin>
        </plugins>
    </build>
</project>
五、在Nacos中配置Sentinel规则

[
  {
    "resource": "all-api",
    "resourceMode": 1,
    "count": 1,
    "intervalSec": 1,
    "controlBehavior": 0,
    "burst": 0,
    "maxQueueingTimeMs": 0,
    "paramItem": {
      "parseStrategy": 0
    }
  }
]
business-service-flow-rules:
[
  {
    "resource": "business-api",
    "resourceMode": 1,
    "count": 1,
    "intervalSec": 1,
    "controlBehavior": 0
  }
]
gateway-api-groups:
[
  {
    "apiName": "all-api",
    "predicateItems": [
      {
        "pattern": "/api/**",
        "matchStrategy": 1
      }
    ]
  }
]
gateway-degradation-rules:
[
  {
    "resource": "business-service-route",
    "count": 500,
    "grade": 0,
    "timeWindow": 10,
    "minRequestAmount": 5,
    "statIntervalMs": 1000,
    "slowRatioThreshold": 0.6
  }
]
六、检查Sentinel控制台是否存在API网关分组及对应的限流规则
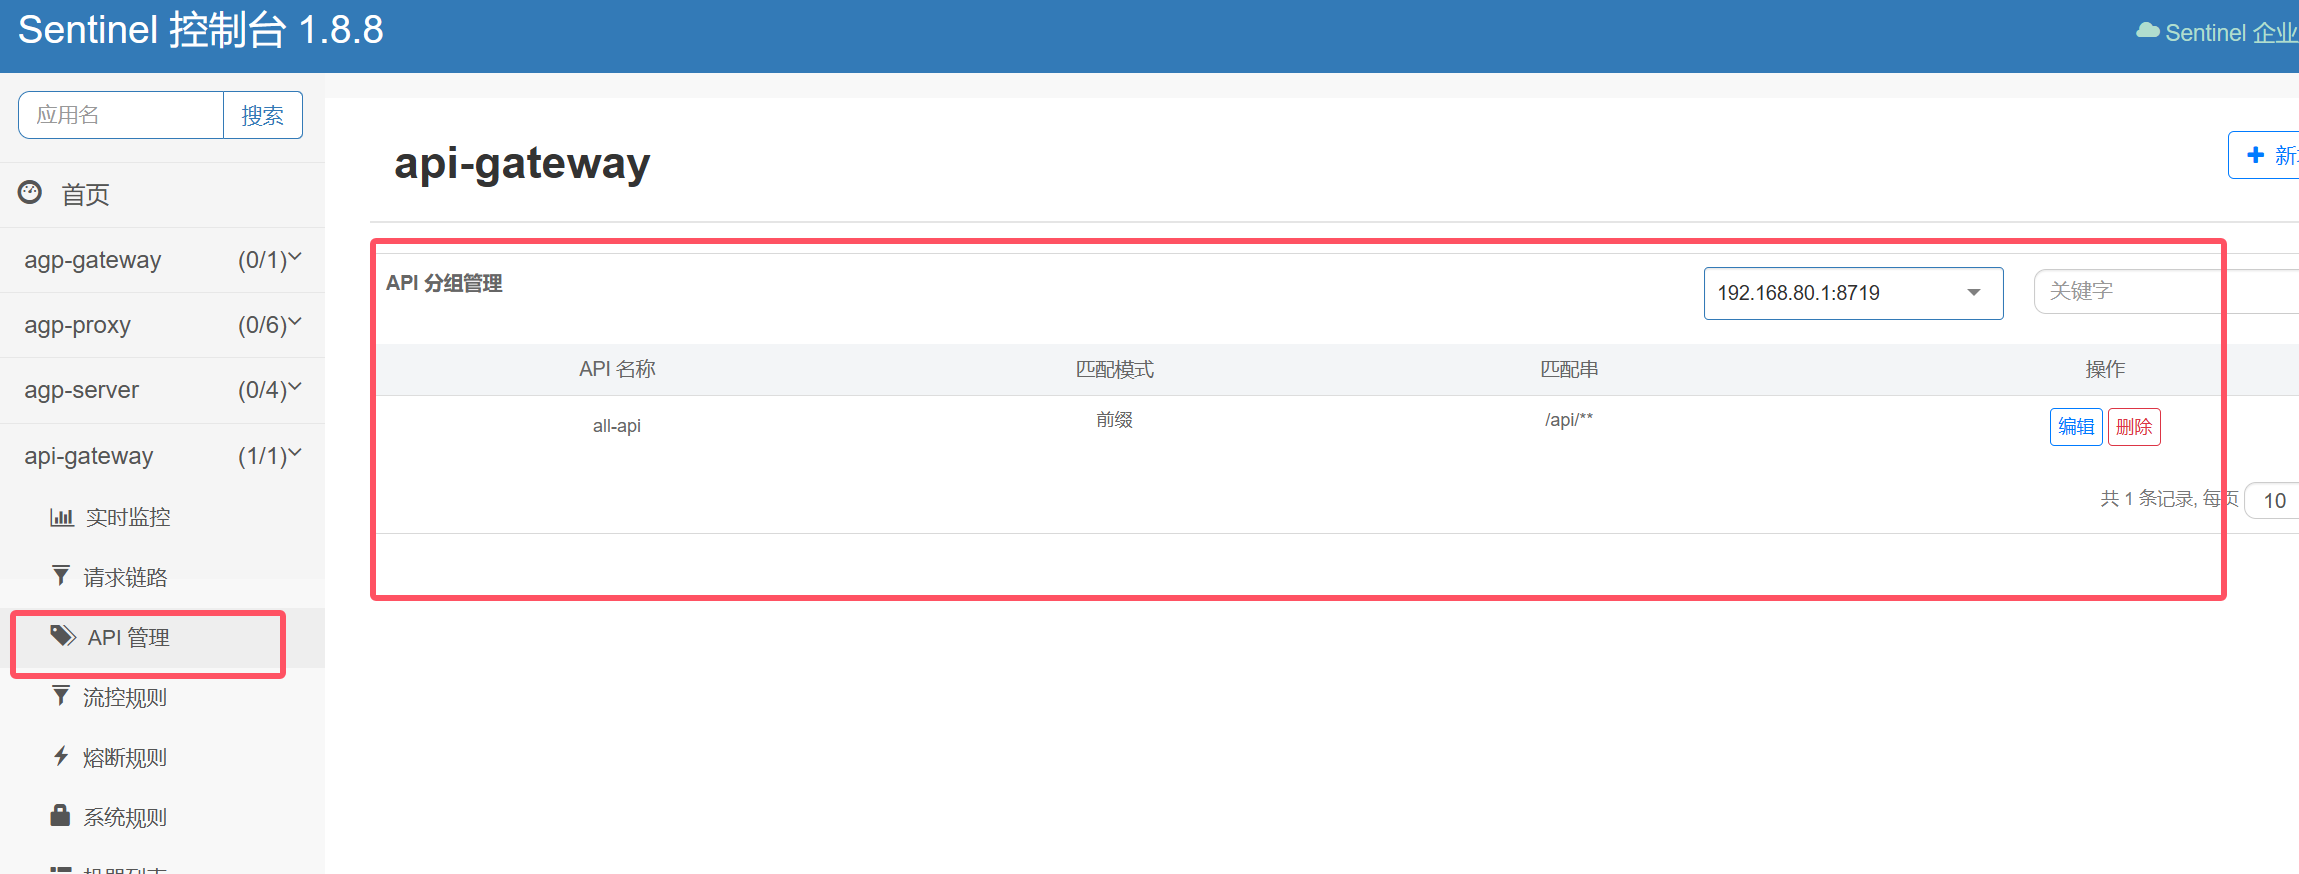
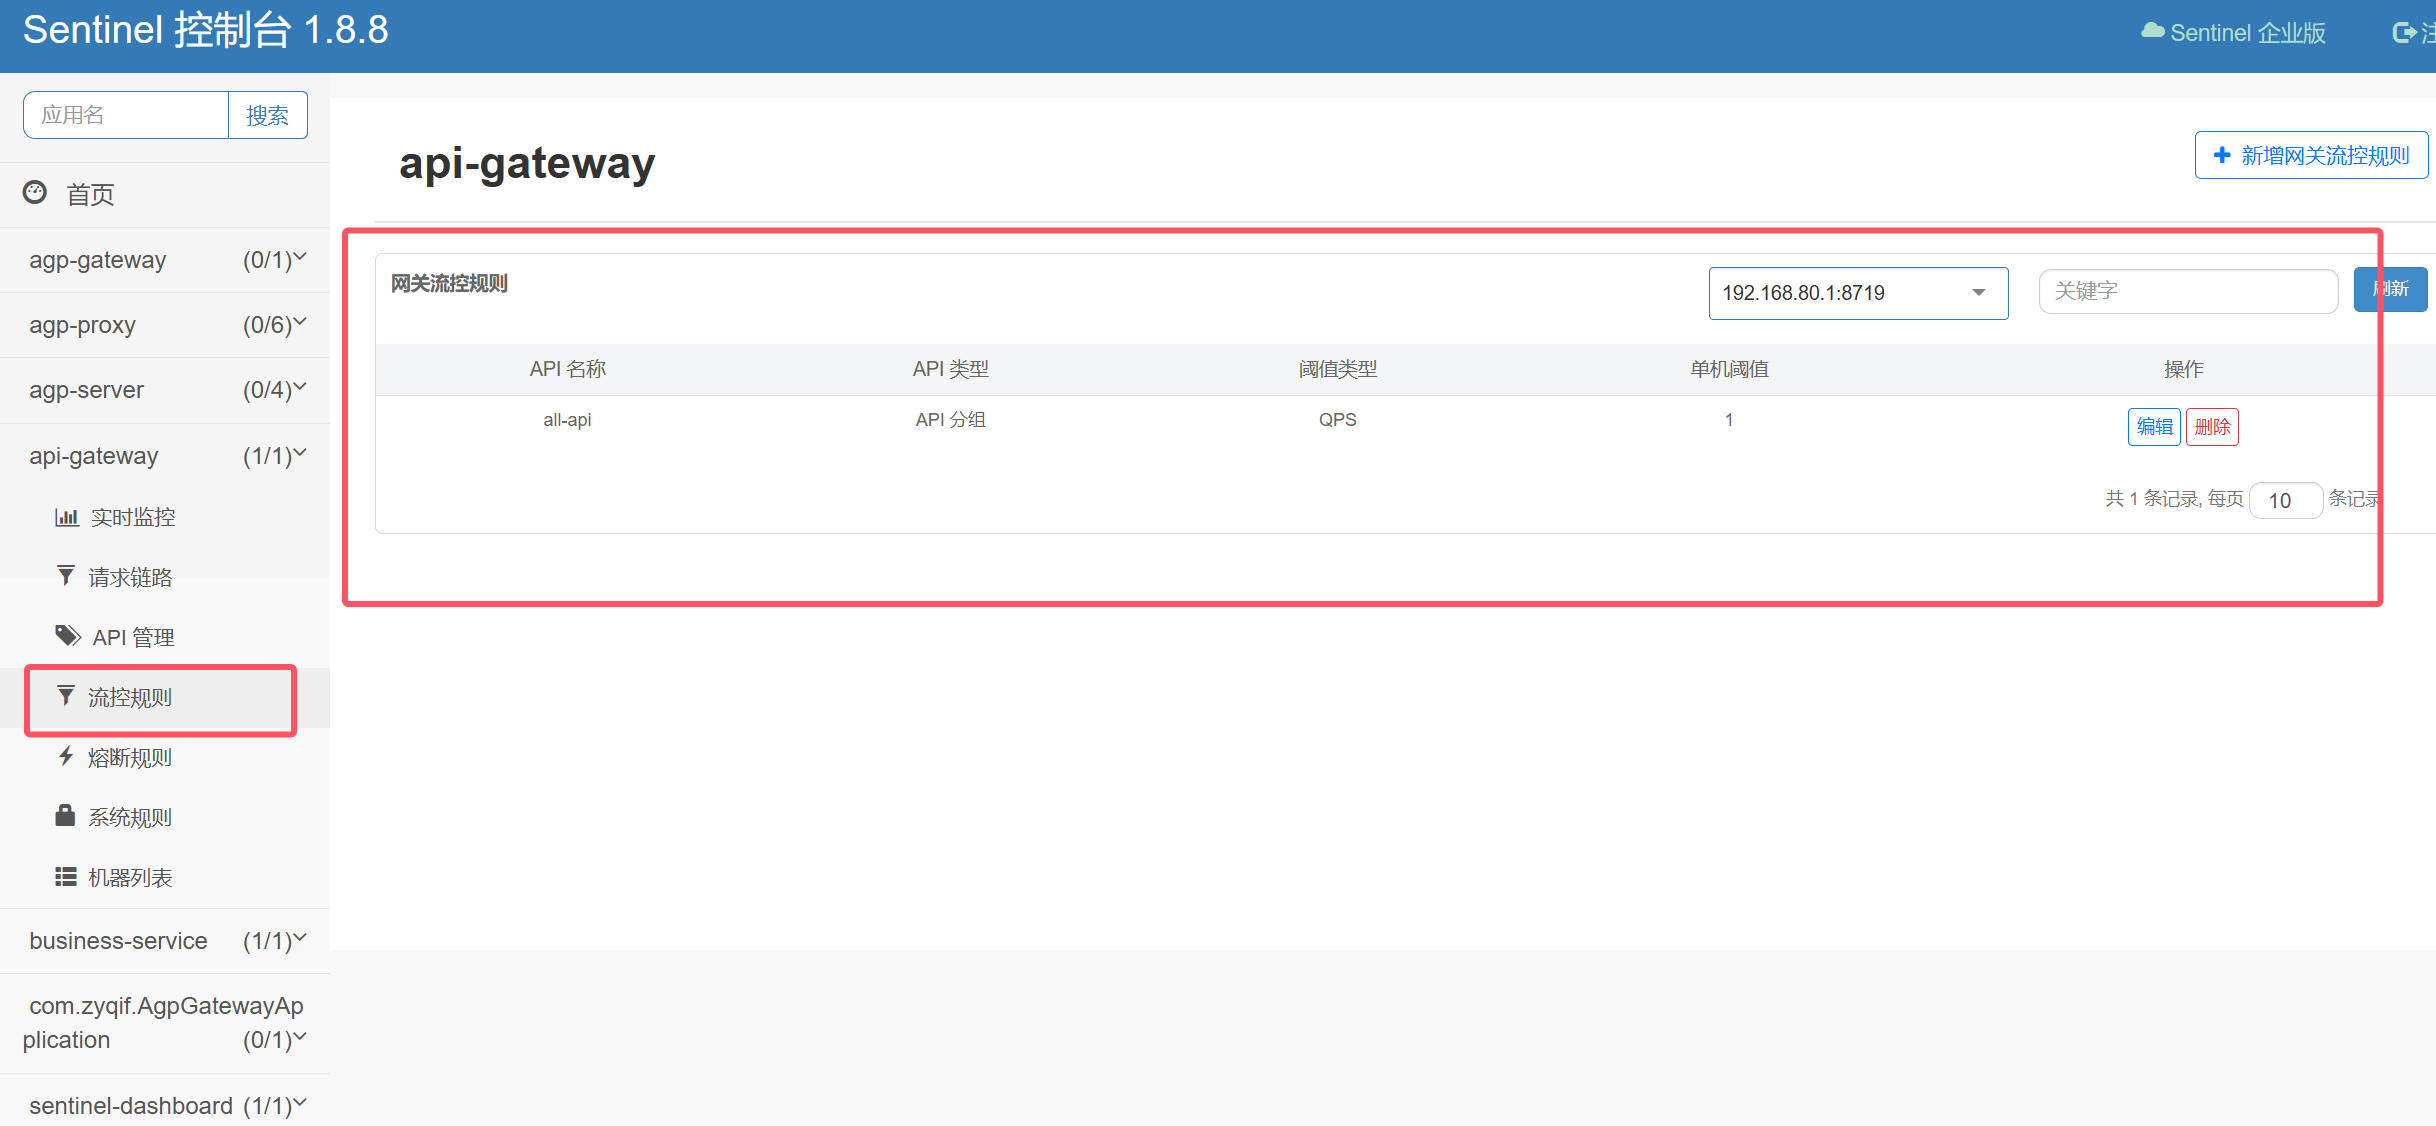
成功显示该页面表明流控规则已从Nacos正常获取。您也可访问以下网站验证规则、分组及熔断配置是否存在。
http://localhost:8080/actuator/sentinel
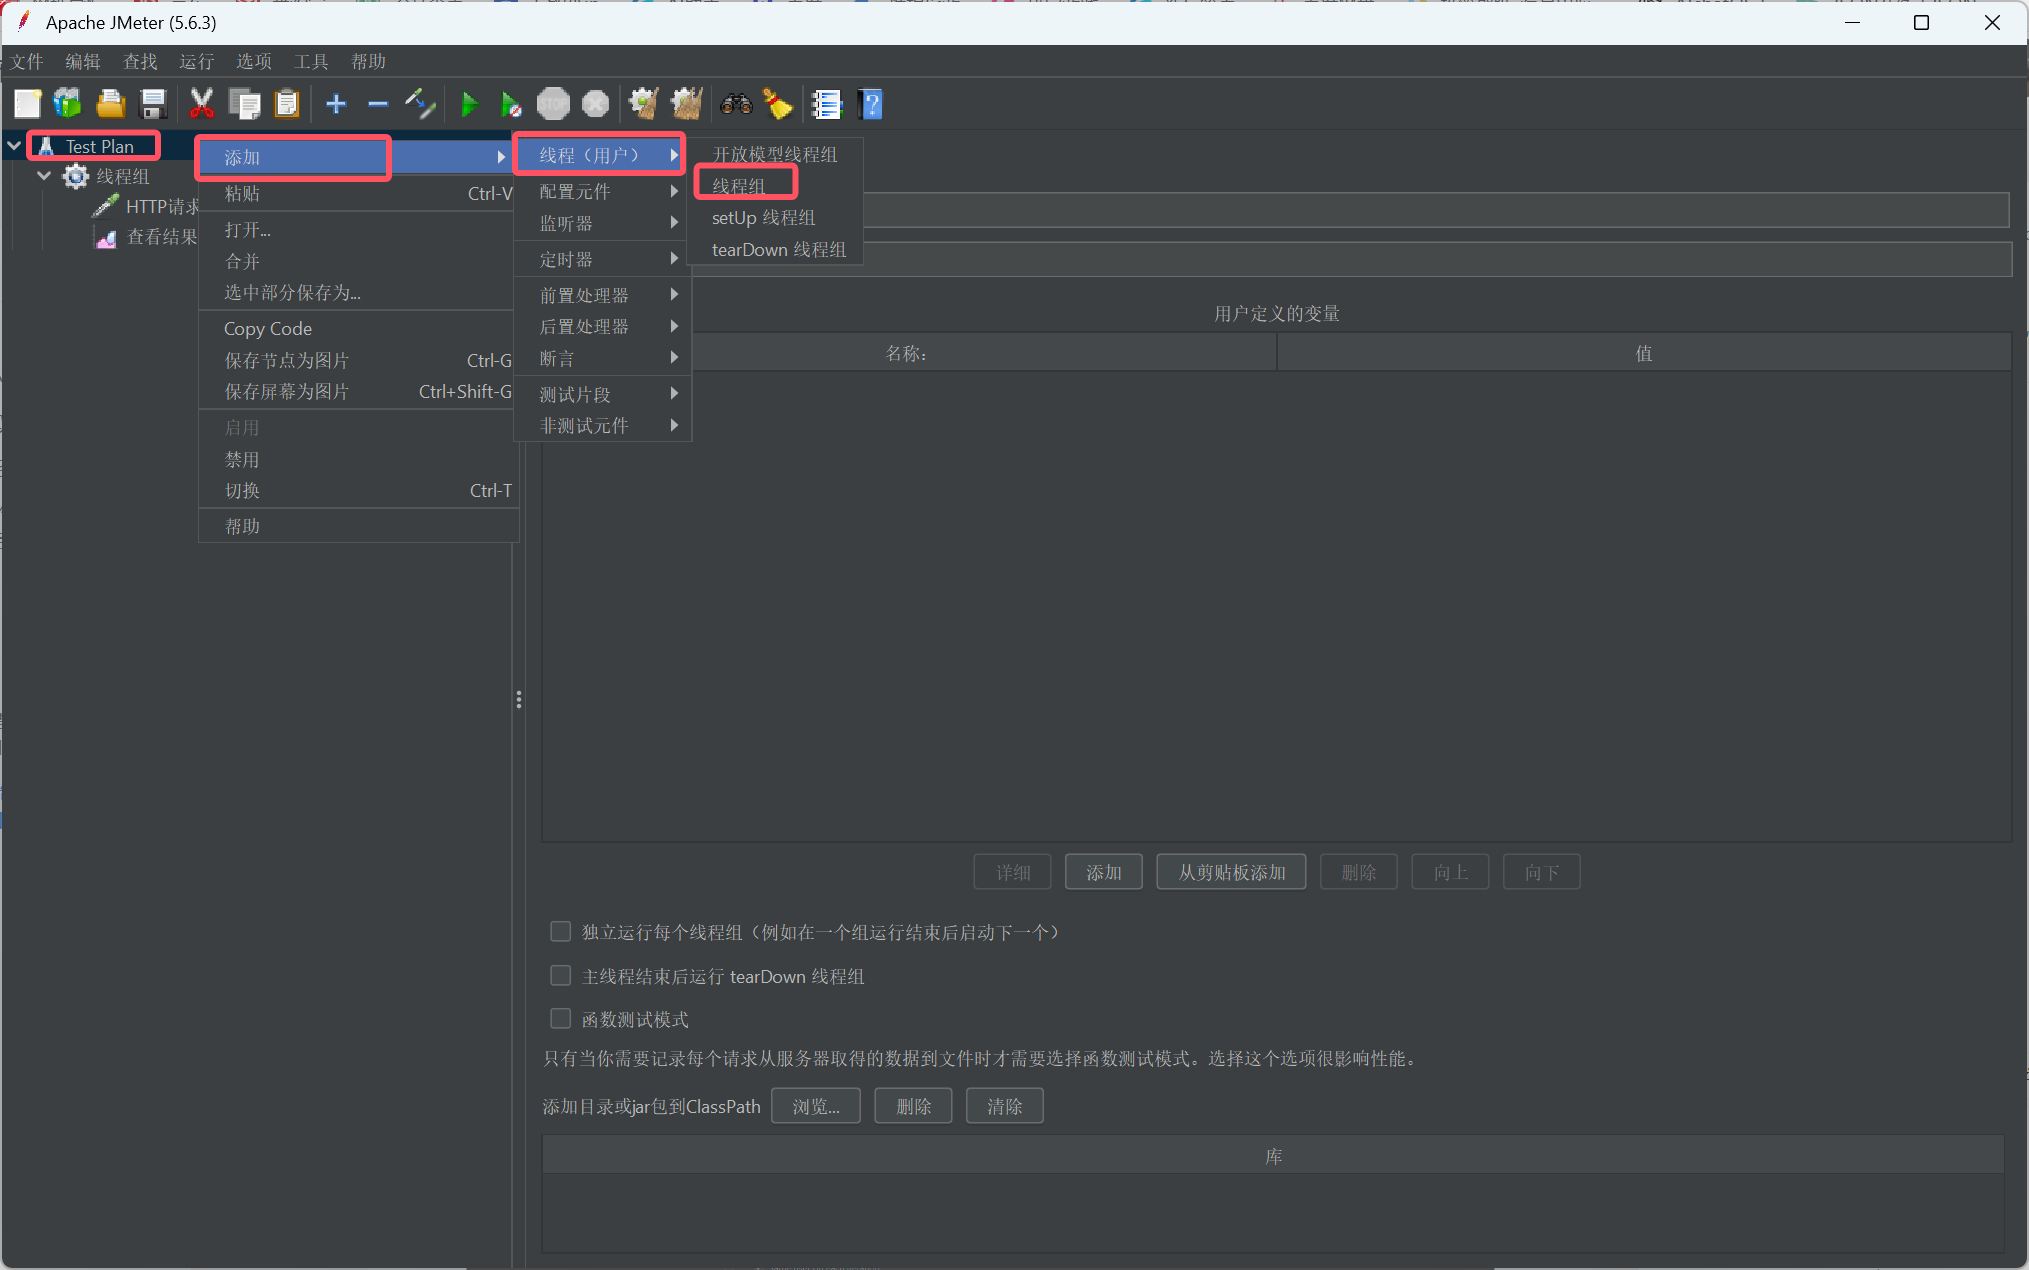
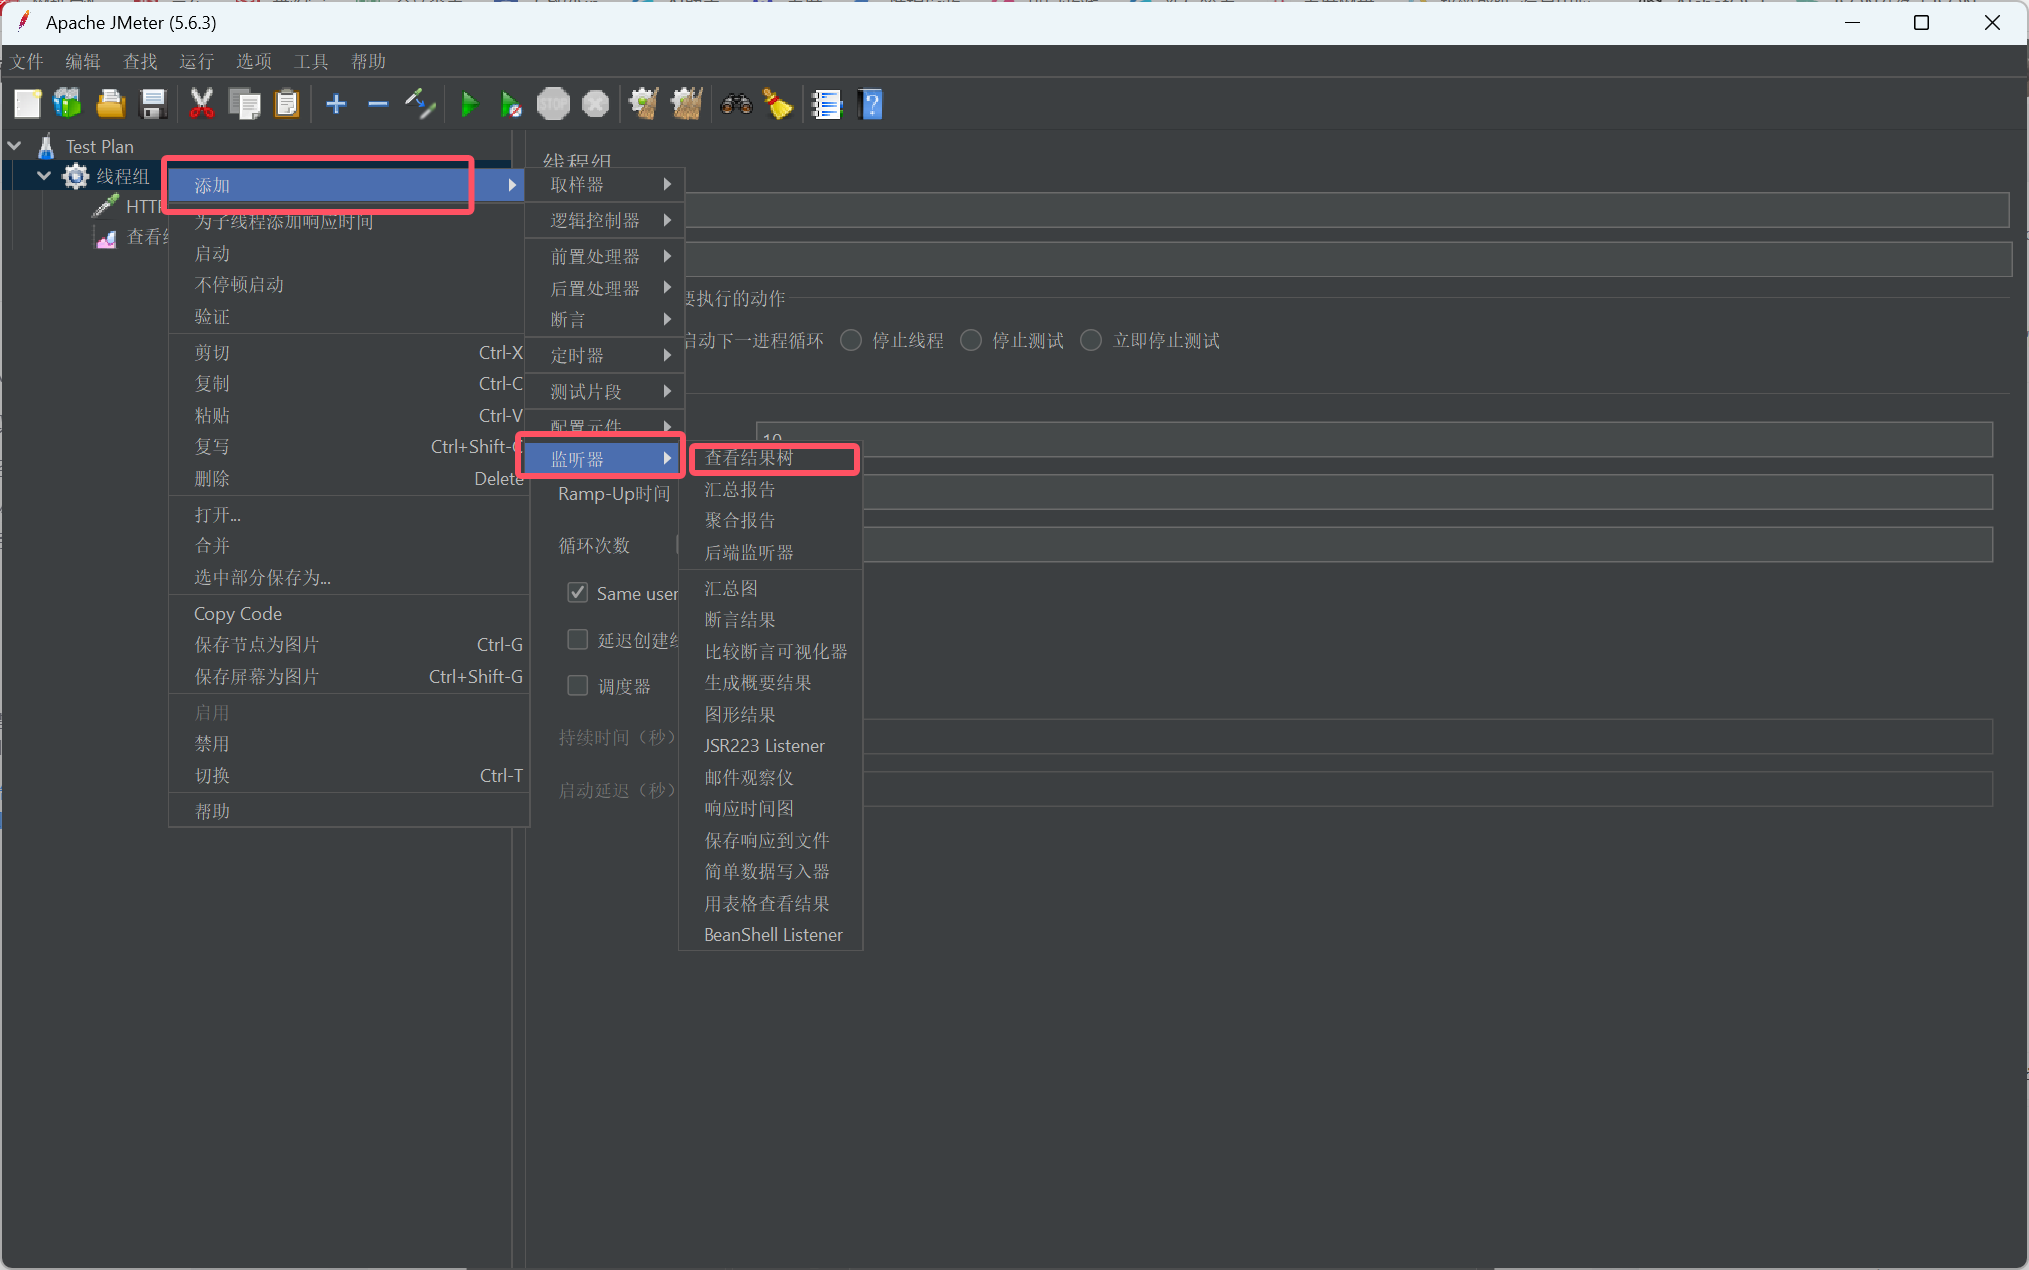
七、使用JMeter进行限流测试:
从一开始就用中文

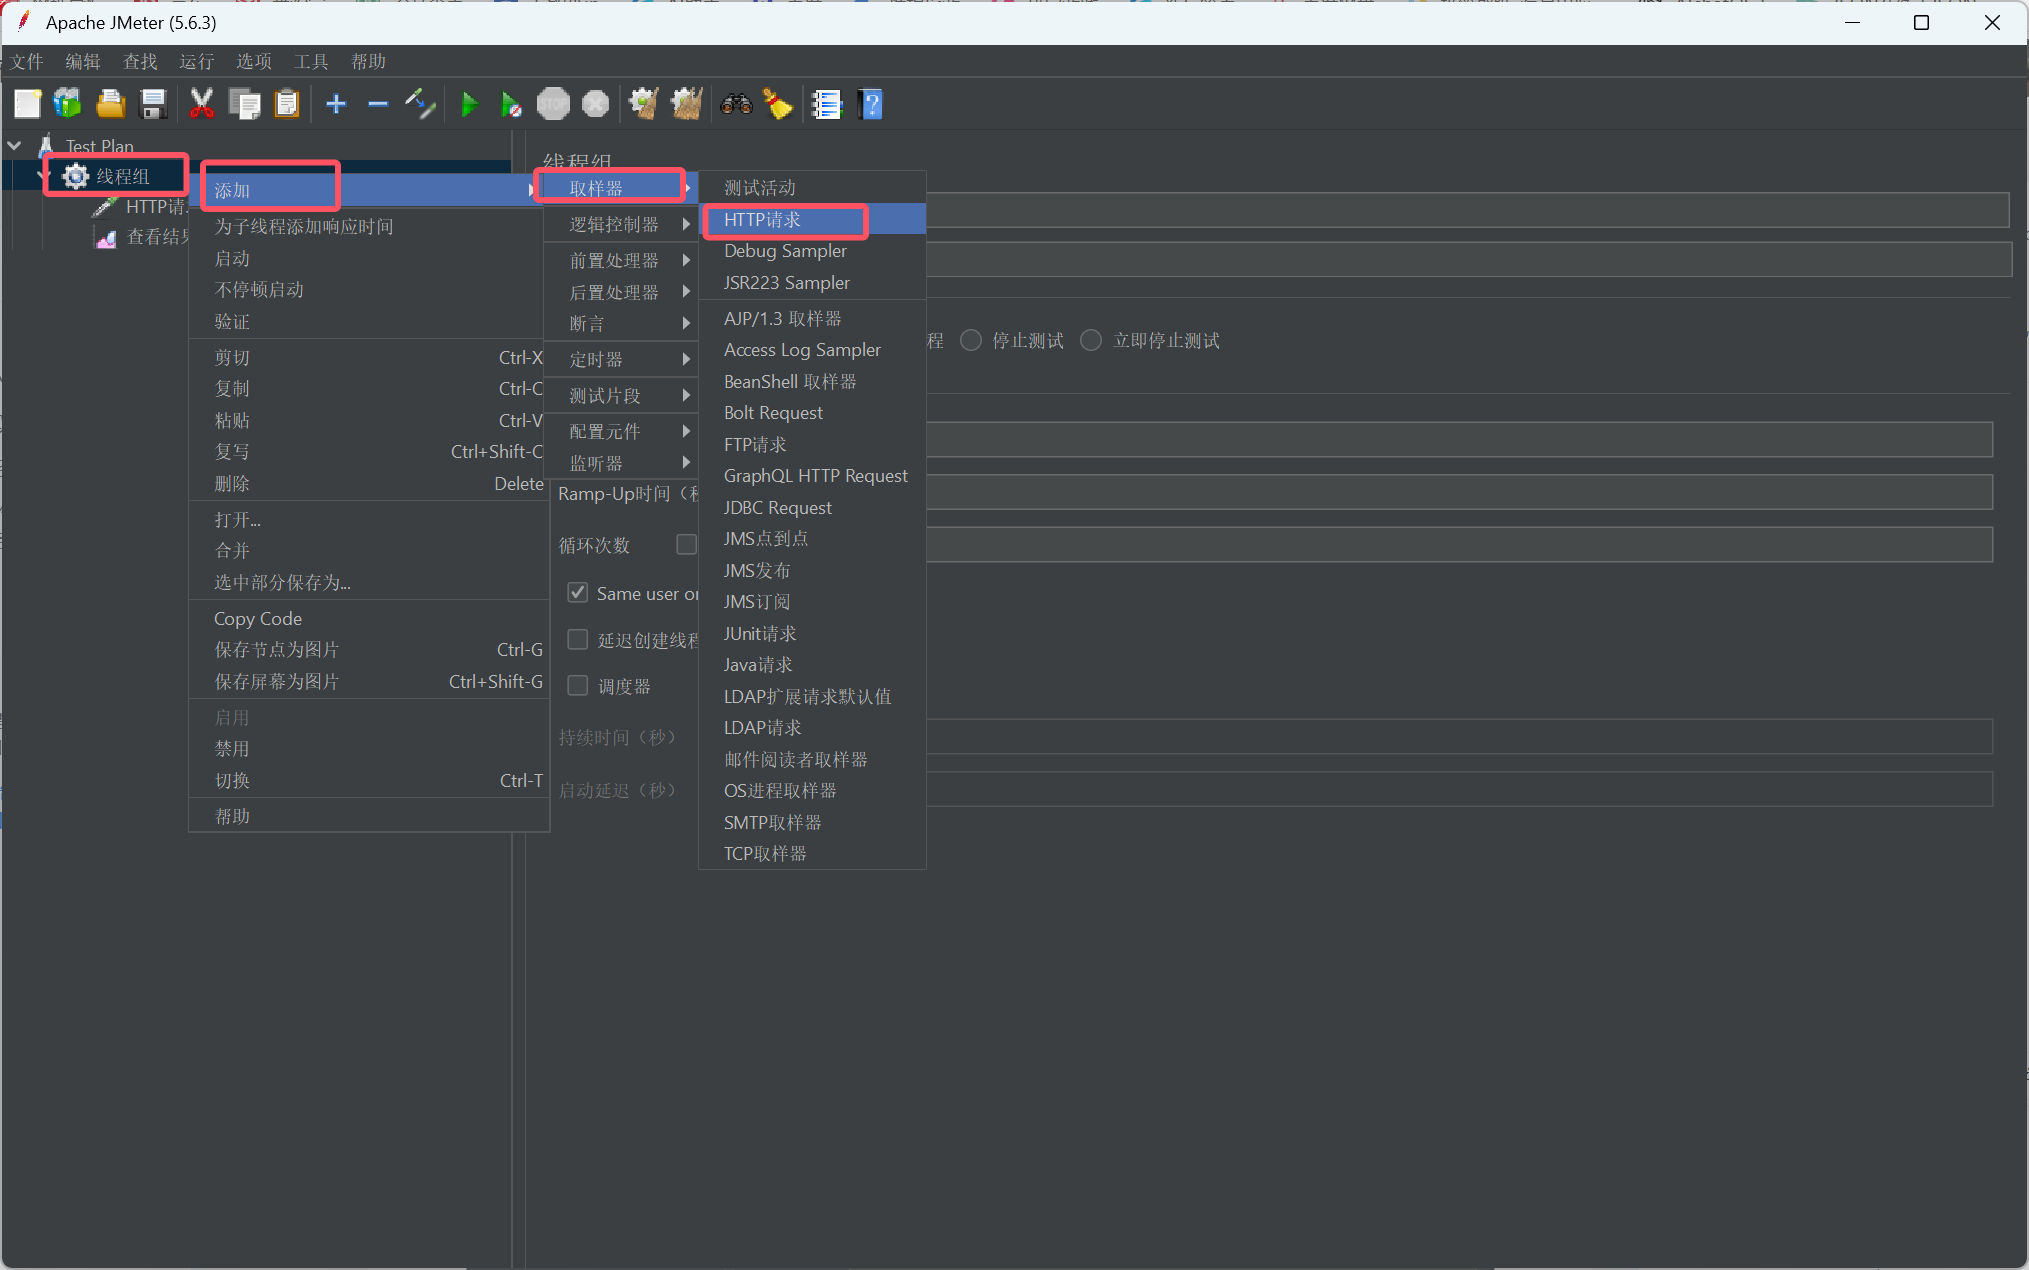
选择线程组的右键操作
发送一个 HTTP 请求:
创建查看结果树(由于聚合报告和汇总报告未发挥作用,因此未创建):
测试效果:


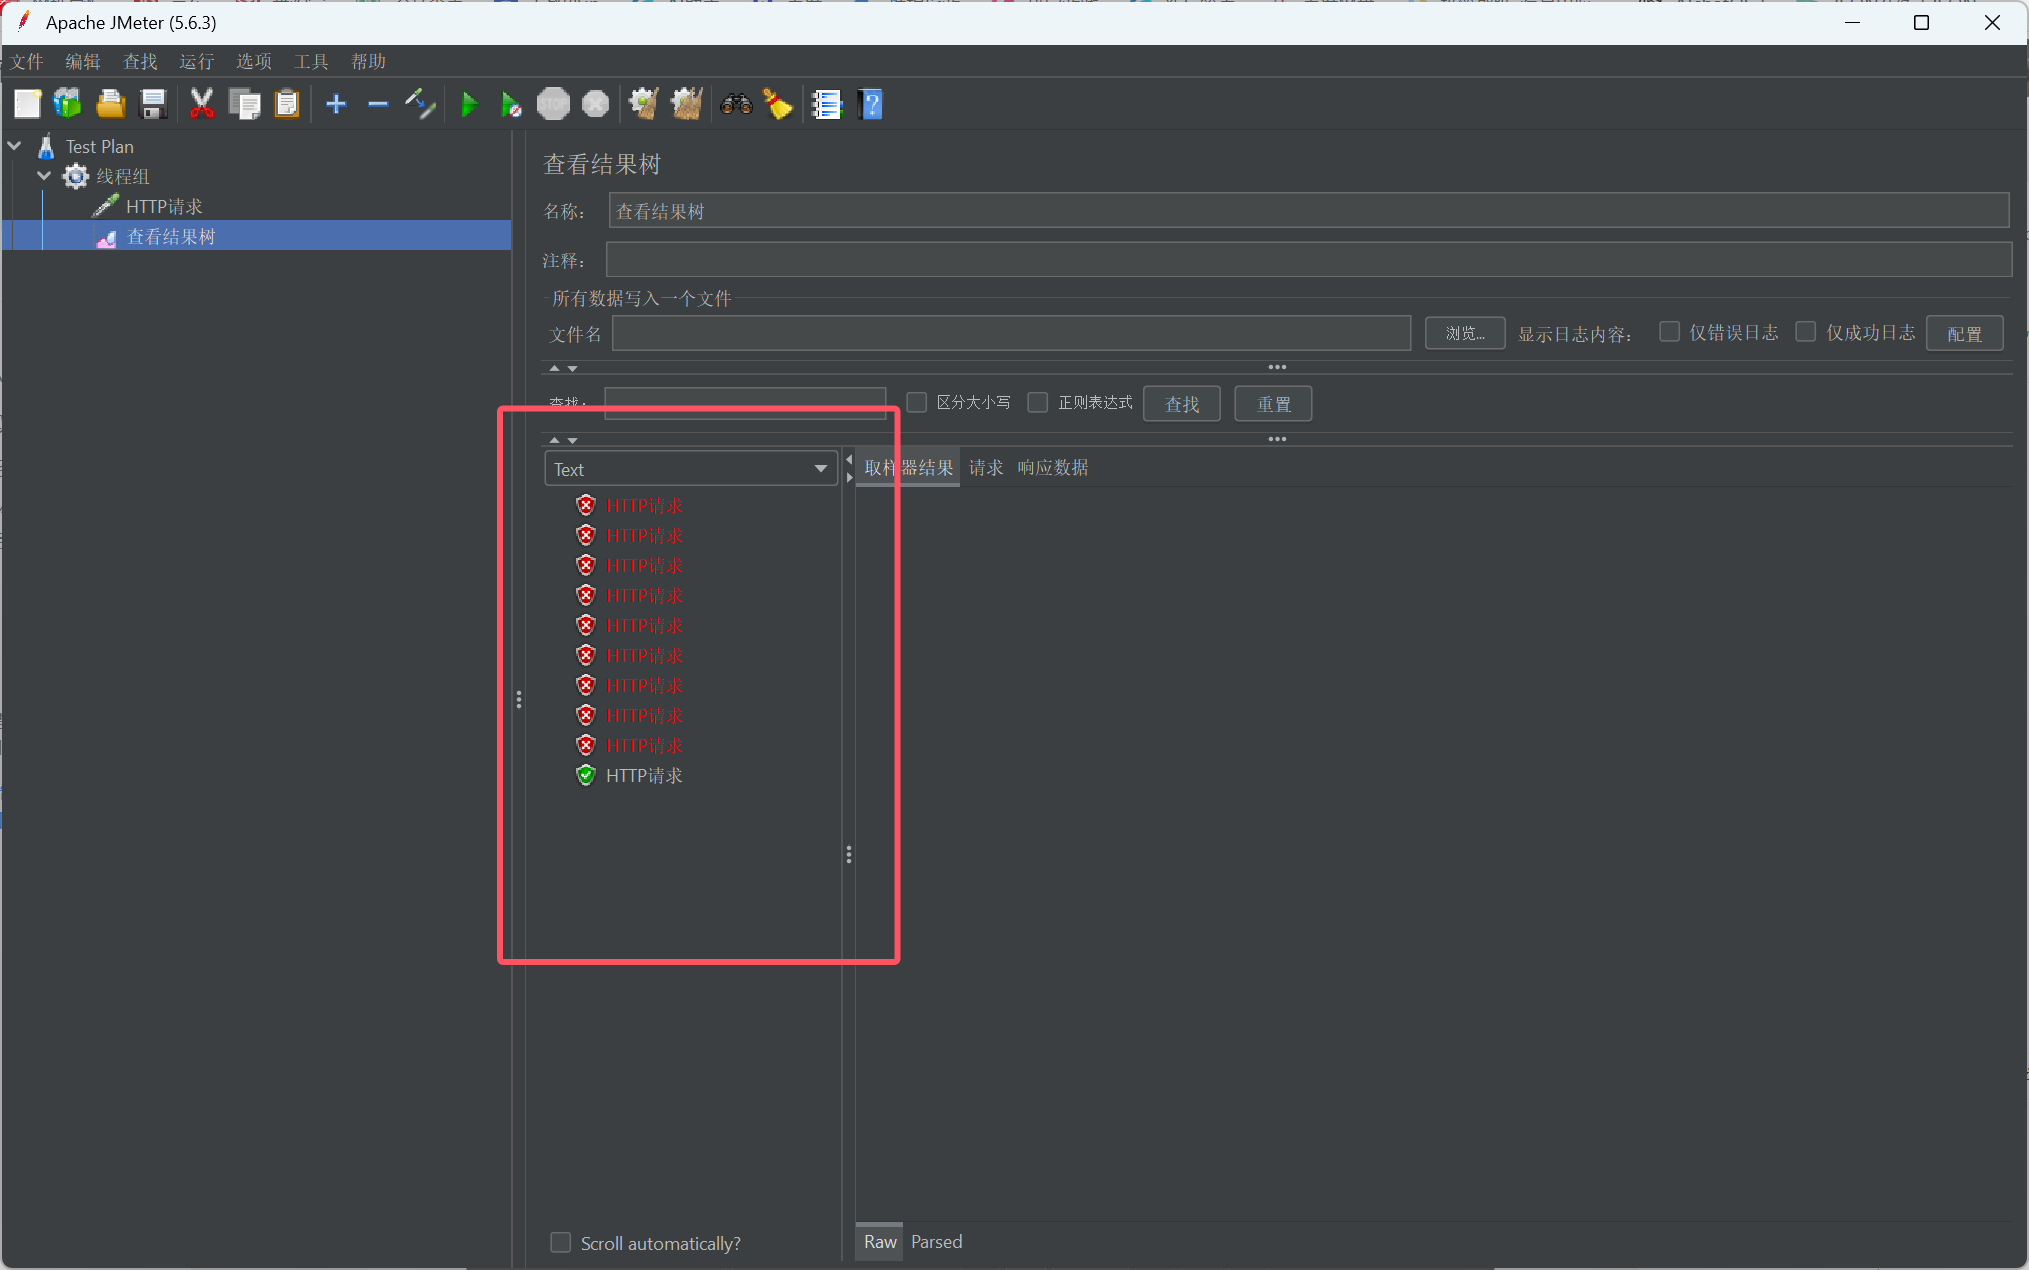
通过Jmeter进行压力测试后,如果出现以下典型效果,可以判断测试已经取得成功,系统性能达到预期目标:
###性能指标达成情况
吞吐量(Throughput):稳定达到预期值(如1000 TPS)
响应时间(Response Time):95%的请求响应时间在可接受范围内(如<2秒)
错误率(Error Rate):低于预设阈值(通常<1%)
###系统资源监控数据
CPU利用率:维持在合理水平(如70%以下)
内存使用:无明显泄漏,波动在正常范围
网络I/O:未出现瓶颈或拥塞现象
###稳定性表现
长时间运行(如24小时)无内存泄漏或性能下降
无服务崩溃或异常终止现象
系统日志中无严重错误或警告
###测试过程监控
线程组(Thread Group)按预期执行完整
采样器(Sampler)成功率达标
监听器(Listener)收集的数据完整可靠
###测试报告分析
聚合报告(Aggregate Report)显示各项指标符合预期
图形结果(Graph Results)曲线平稳无异常波动
各事务控制器(Transaction Controller)均成功执行